
Aug 27, 2024
Mohamed Ali Memmi
How to Create and Manage a New Project on Our Platform
Creating a new project on our platform is a straightforward process. Follow these steps to set up your project, upload files, organize them into sections, and finalize your project settings.
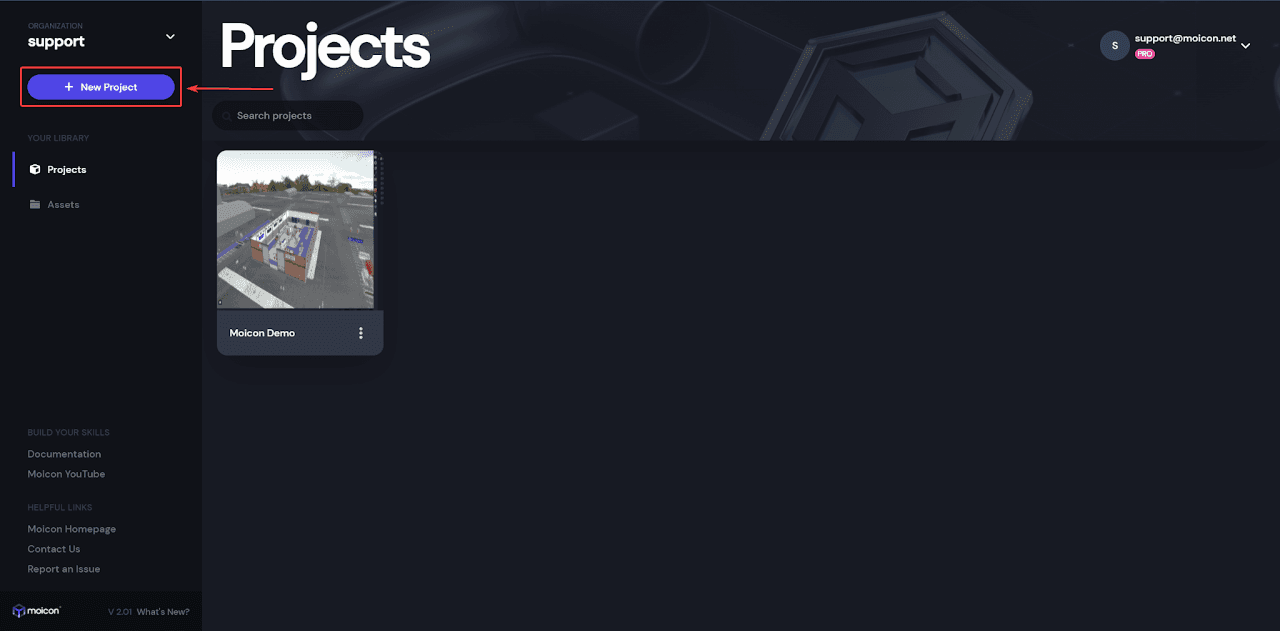
Step 1: Select “New Project”
To begin, log in to your account and navigate to the dashboard. Click on the “New Project” button to start the project creation process.
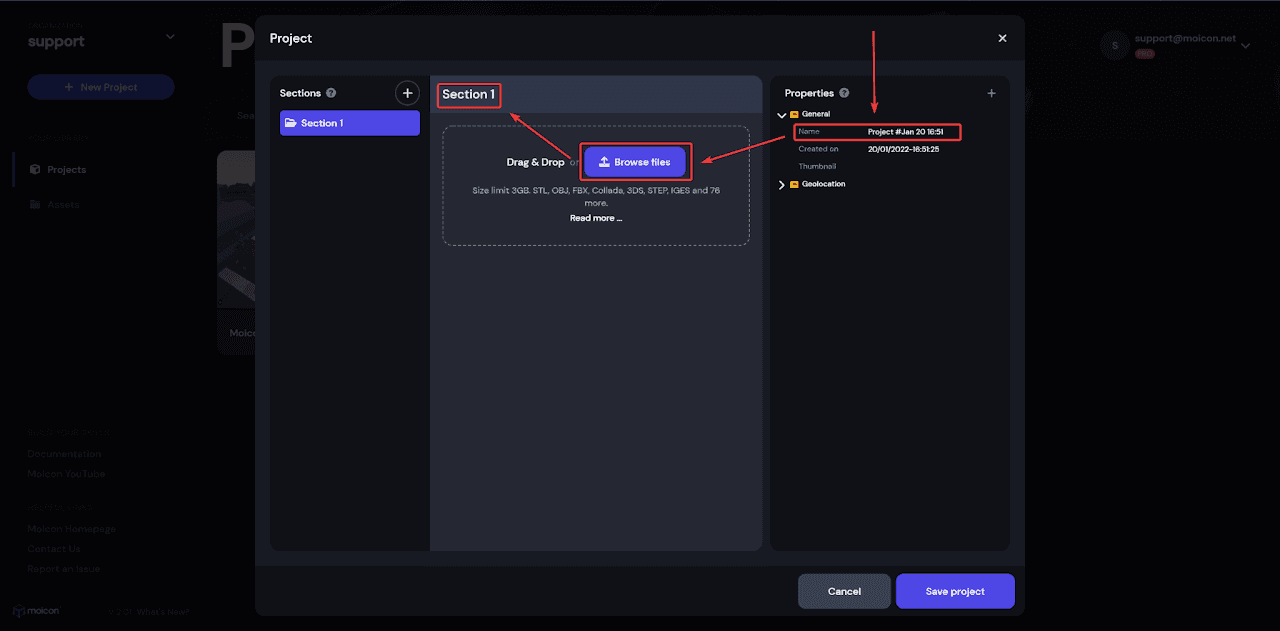
Step 2: Customize Your Project
1. Change the Project Name:
Enter a unique and descriptive name for your project to make it easily identifiable.
2. Set the Section Name:
Each project can be divided into different sections. Provide a relevant name for the first section of your project.
3. Upload Files:
Click on “Browse files” to upload your files. This will open your file explorer.
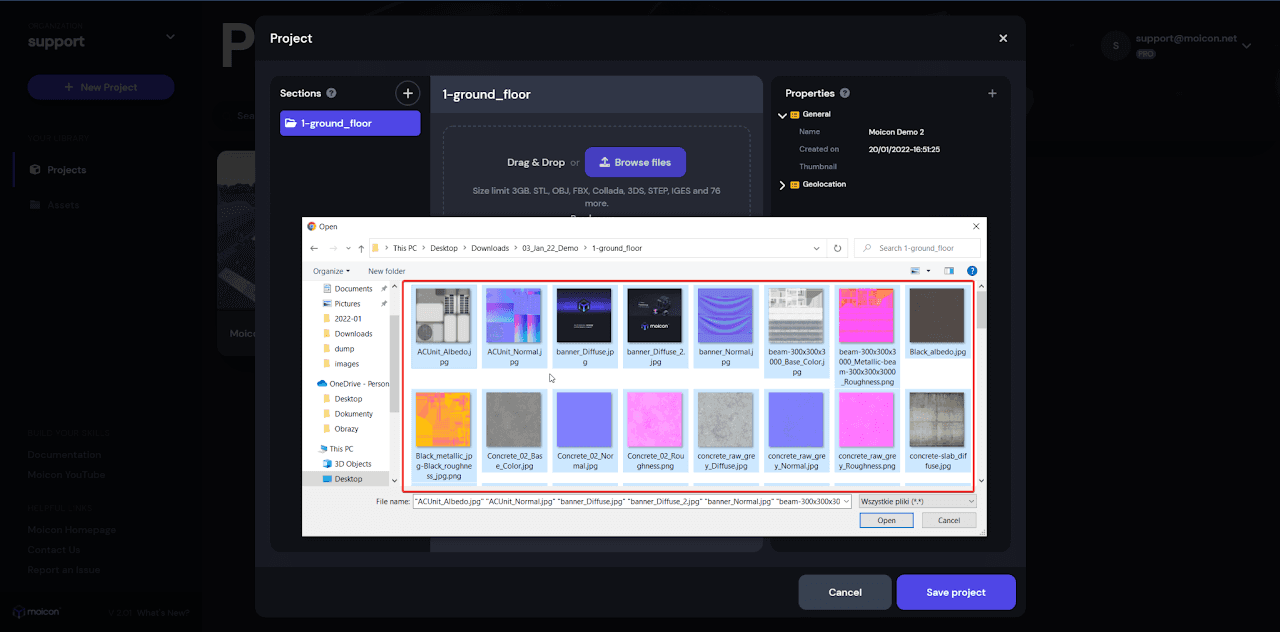
Step 3: Select and Upload Files
1. Choose the Desired Folder:
Navigate to the folder on your computer that contains the files you want to upload.

2. Select Files:
Click on all the files you wish to upload. Once selected, confirm your choice by clicking “Open”.
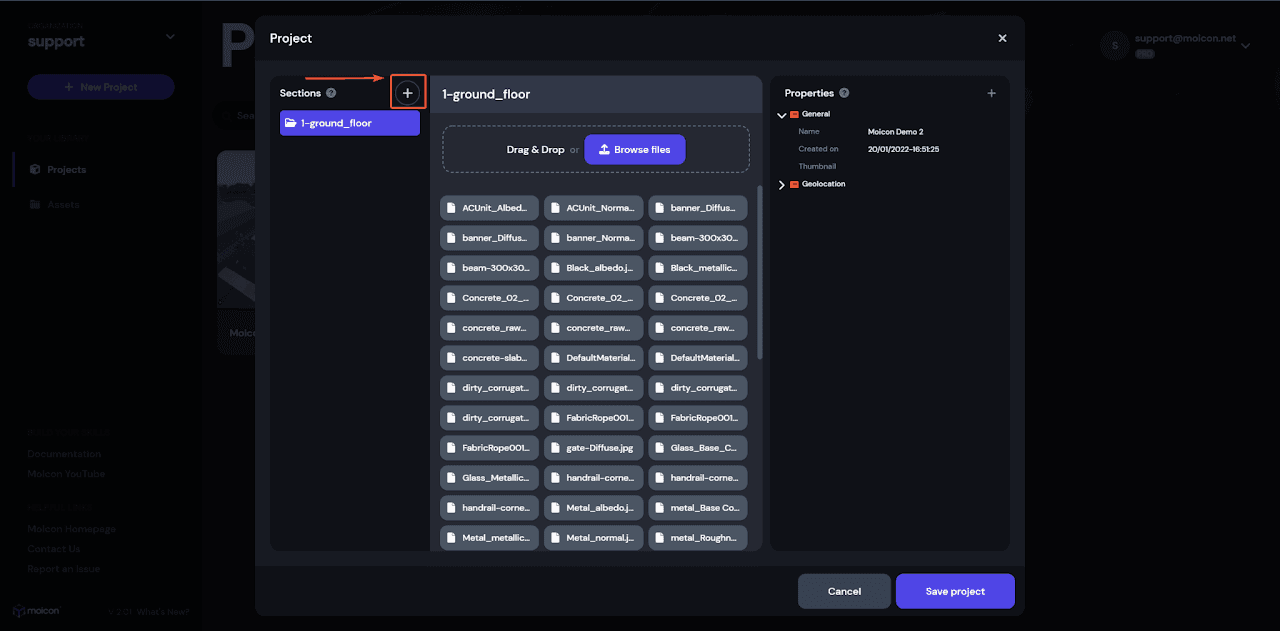
Step 4: Add New Sections
• If your project requires multiple sections:
• Click on the ”+” button to add a new section.
• Repeat the file upload process for each new section.
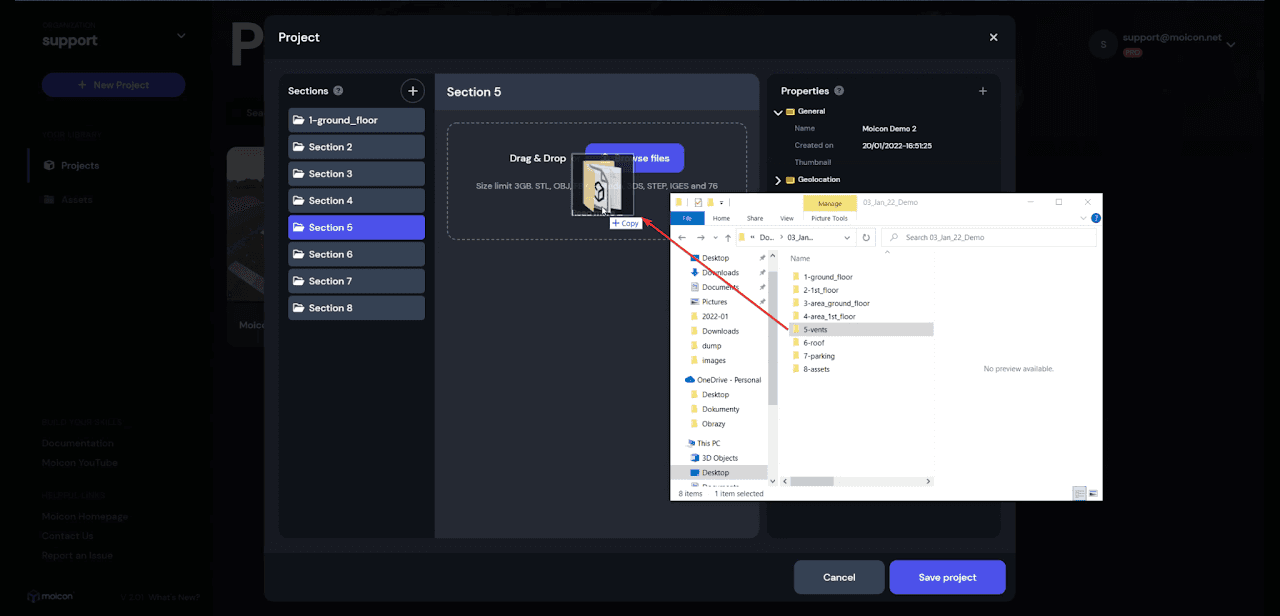
Step 5: Drag & Drop File Upload (Optional)
• Alternatively, you can simply drag and drop files directly into the sections. This method provides a quick and easy way to manage your project files.
Step 6: Finalize Your Project
• Review your project to ensure all sections are added and all files are correctly uploaded.
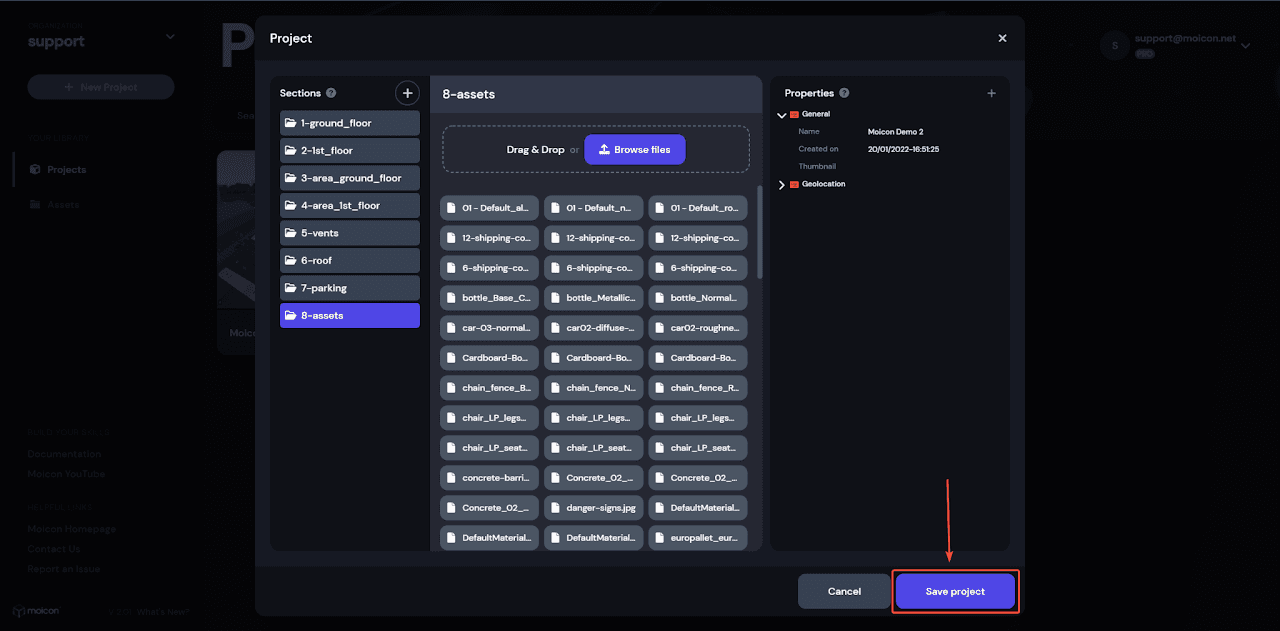
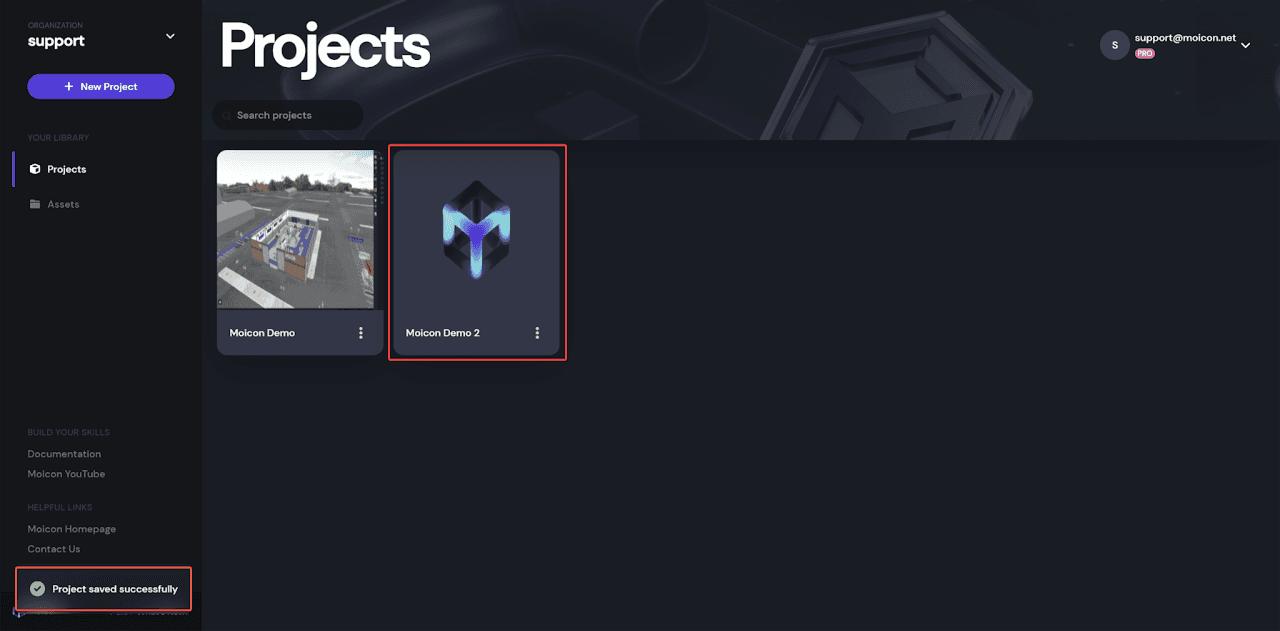
• Once satisfied, click on “Save Project” to save your progress.
Step 7: Edit or Delete Sections
• At any time, you can return to the project to edit or delete sections as needed. This flexibility allows you to keep your project up-to-date.
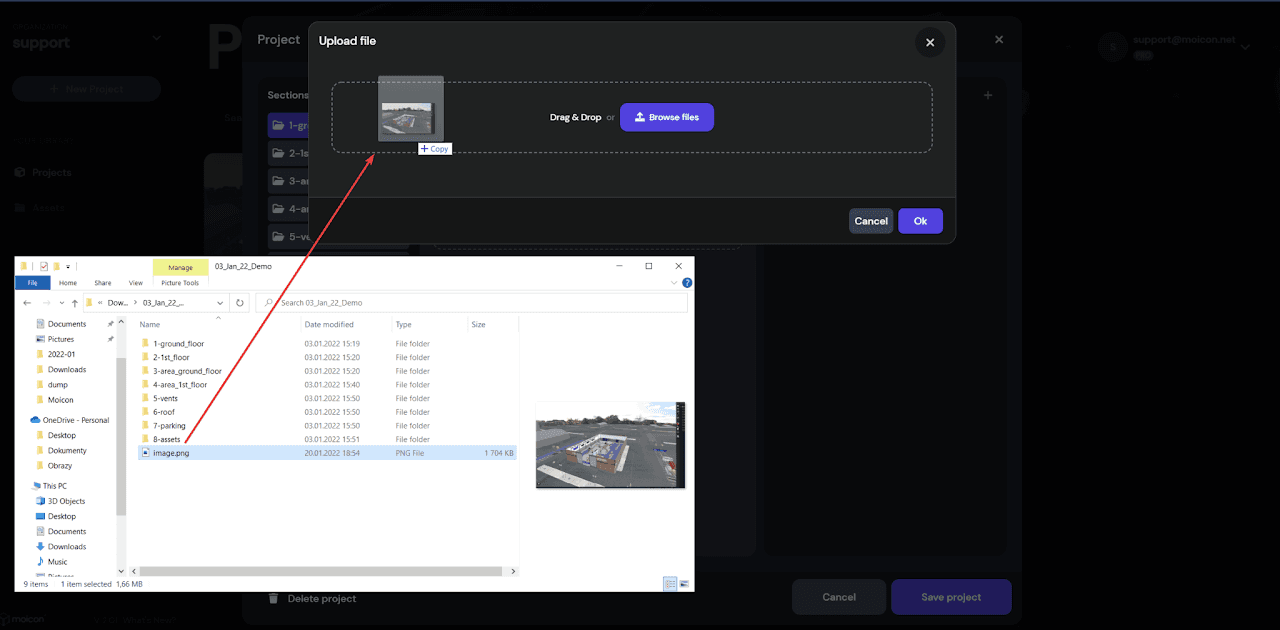
Step 8: Add a Thumbnail
1. Select Thumbnail:
Choose a thumbnail image that represents your project.

2. Upload Thumbnail Image:
Drag and drop the desired picture into the designated area, or click to browse and select the image.
Step 9: Manage Your Project in Explorer
1. Open Your Project:
Once saved, open your project from the dashboard.
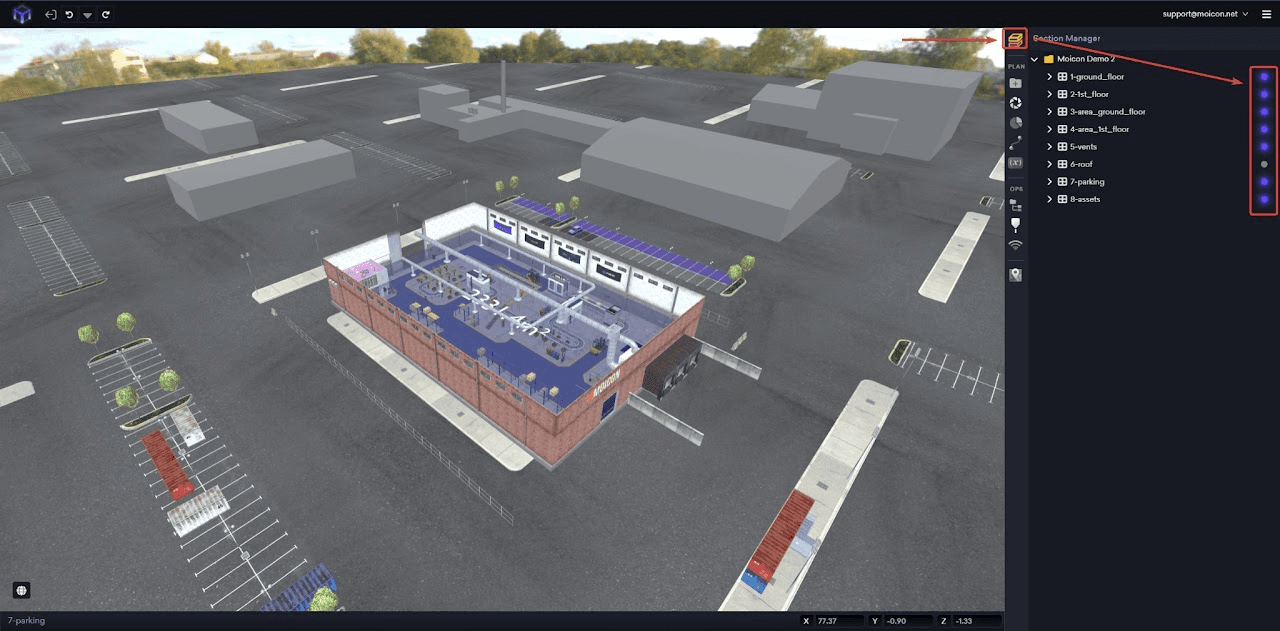
2. Access Section Manager:
Select the “Section Manager” within your project to control the visibility of your sections.
3. Turn On Desired Sections:
Toggle the switch to turn on the sections you wish to make active and visible.
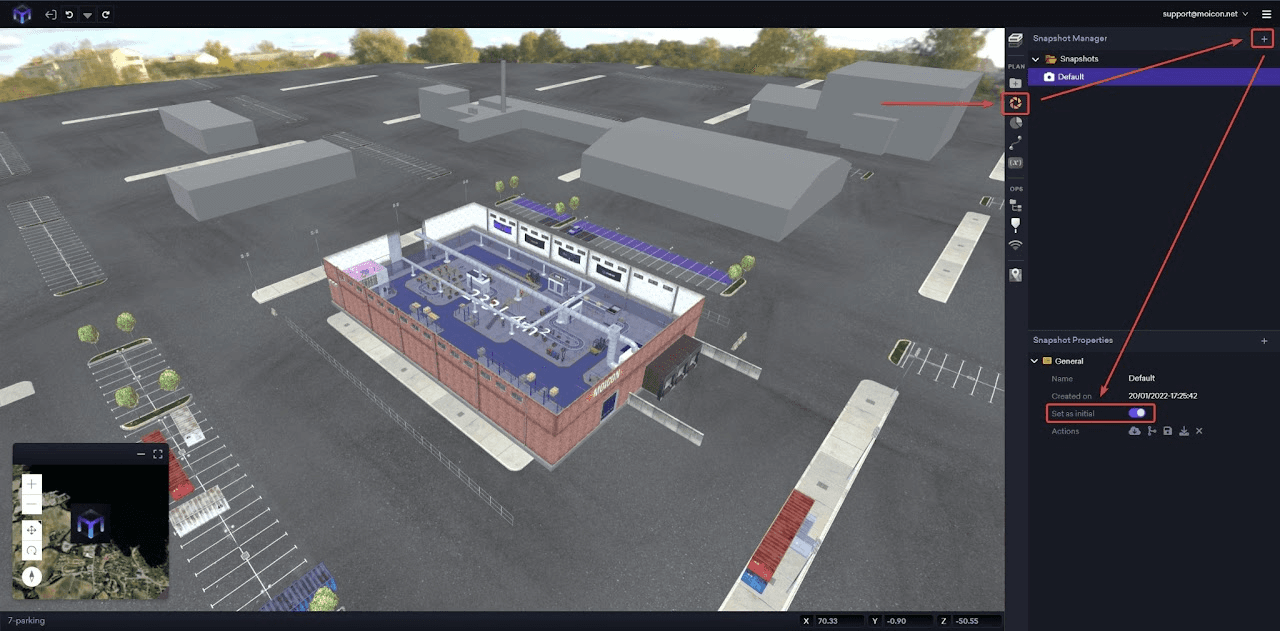
Step 10: Set Initial Snapshot
• Set as Initial:
After configuring your sections, ensure you select and set your desired snapshot as the initial view. This step is crucial for defining what your project will display when first opened.


 Moicon Chatbot
